How to Remove Gel Nails at Home Without Damaging Them
Gel nails are wonderful until the moment you need to take them off and the salon is closed, or the appointment is two weeks away, or you simply don’t want to pay for a removal service on top of everything else. The temptation to just peel them off is real, and if you’ve ever given in to it, you already know the result: thin, damaged, sometimes painful nails that take weeks to recover. That satisfying peel is actually stripping layers of your natural nail along with the gel, which is why it feels so wrong even as it’s happening.
The good news is that removing gel nails at home properly is genuinely achievable with the right materials, the right technique, and a little patience. It takes longer than peeling, but it leaves your natural nails in significantly better condition, and once you’ve done it correctly a few times it becomes a straightforward process rather than a daunting one.
This guide walks through everything you need for a safe at-home gel removal, the step-by-step process in detail, what to do for your nails afterward, and the mistakes most people make that turn a manageable removal into a damaging one.
Why Peeling Gel Off Is So Damaging
Understanding what actually happens when you peel gel nails off makes it much easier to resist the temptation, because the damage isn’t obvious until it’s already done. Gel polish bonds to the surface of the natural nail during the curing process, and that bond doesn’t just sit on top of the nail. It adheres to the outermost layers of the nail plate itself. This is what makes gel so durable and long-lasting, but it’s also what makes forced removal so damaging.
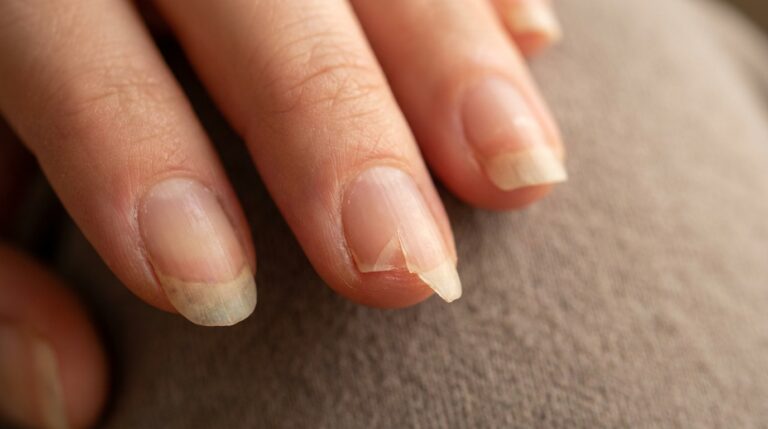
When you peel or force gel off rather than dissolving the bond with acetone, you’re not just removing the gel. You’re removing the layers of nail plate that the gel bonded to along with it. Each peel takes a thin layer of your natural nail with it, leaving the nail thinner, weaker, and more flexible than it was before. Do this repeatedly and the nails become paper-thin, bendy, and prone to breaking at the slightest pressure. Some people experience sensitivity and even mild pain from the thinning of the nail plate, since the nail is no longer providing adequate protection to the nail bed beneath it.
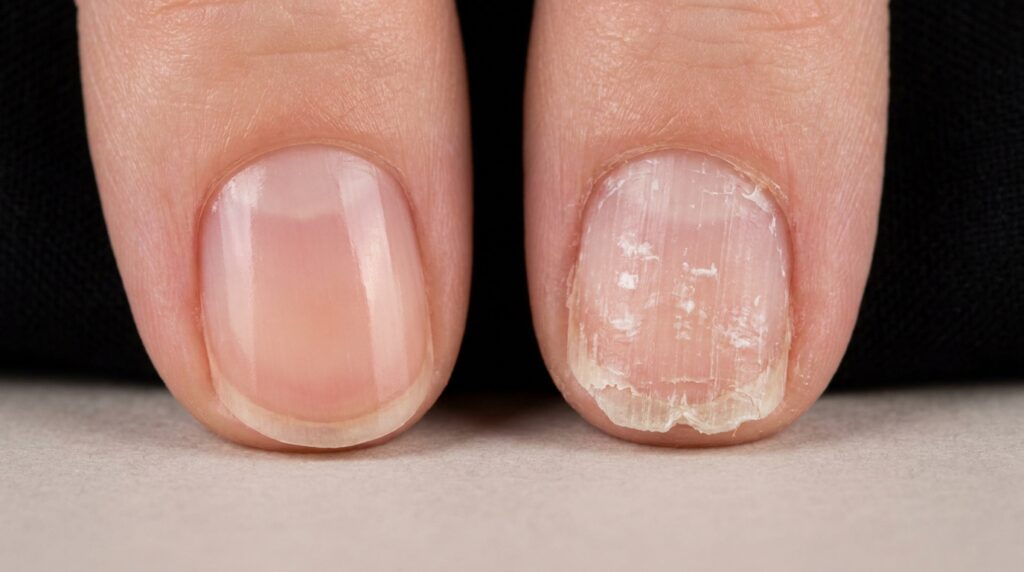
The same damage happens when gel is filed off aggressively without proper soaking first. Using a coarse nail file to grind through the gel layers without first softening the bond removes natural nail along with the product, particularly toward the end when the file makes contact with the nail surface before all the gel is gone. This is a common mistake people make when they’re impatient with the soaking process and decide to speed things up by filing, not realizing that the filing is doing as much damage as the peeling they were trying to avoid.
Acetone dissolves the gel’s bond to the nail plate rather than ripping it away, which is why the soak-off method leaves the natural nail significantly more intact. It takes longer and requires more patience, but the difference in how your nails look and feel afterward is substantial. Nails removed correctly with acetone should look and feel almost exactly as they did before the gel was applied, perhaps slightly dryer from the acetone exposure but not thinner or damaged in any meaningful way.
What You Need
Having everything ready before you start makes the process significantly smoother and reduces the temptation to rush or cut corners when you’re mid-process and realize you’re missing something.
Pure acetone is the most important item on the list and is worth buying specifically for this purpose rather than using regular nail polish remover, which contains acetone at a much lower concentration alongside other ingredients that dilute its effectiveness. Pure acetone is available at most pharmacies and beauty supply stores and is significantly more effective at breaking down gel than standard remover. The higher the acetone concentration, the faster and more effectively the gel softens, which means less time soaking and less physical effort to remove the product.
Aluminum foil cut into small squares is the most widely used method for keeping acetone in contact with each nail during the soaking process. Each square needs to be large enough to wrap around the fingertip and hold a cotton pad in place. Cutting ten squares in advance rather than trying to cut them mid-process saves time and frustration.
Cotton pads or cotton balls soak up the acetone and hold it against the nail surface during the removal. Cotton pads cut into smaller pieces tend to work better than full cotton balls since they sit flatter against the nail and maintain more even contact with the gel surface.
A coarse nail file or a nail buffer is used to break the seal on the top coat before soaking begins. Lightly filing the surface of the gel without going through to the natural nail allows the acetone to penetrate the product more effectively, which significantly speeds up the removal.
A cuticle pusher or an orange stick is used to gently push away the softened gel after soaking rather than picking or scraping, which can scratch the nail surface. A metal cuticle pusher works well but an orange stick is gentler and works just as effectively on softened gel.
Cuticle oil and a rich hand cream for the finishing steps, since acetone is extremely drying to both the nails and the surrounding skin, and replenishing moisture immediately after removal is an important part of keeping the nails in good condition.
A nail strengthening treatment or base coat to apply once the nails are clean and dry, which helps protect and reinforce the natural nail after the gel has been removed.
Step One: File the Surface
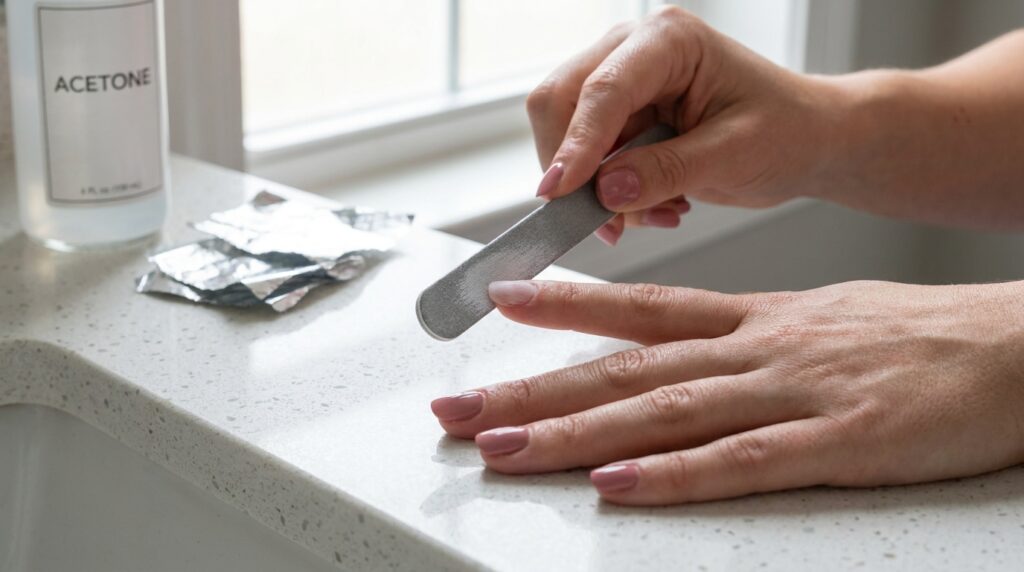
Before any acetone touches the nail, lightly file the surface of the gel to break the seal of the top coat. The top coat on gel nails is designed to be hard and protective, and its sealed surface prevents acetone from penetrating as quickly or as effectively as it needs to. Filing through the top coat and into the color layer without going through to the natural nail creates a roughened surface that the acetone can grip and work through much more efficiently.
Use a medium-grit nail file for this step rather than a very coarse one, which can be too aggressive and make it harder to stop before reaching the natural nail. You’re not trying to file the gel off entirely. You’re just removing the shine of the top coat and creating a slightly roughened surface. The gel should look matte and scratched rather than shiny when this step is done correctly.
Take care around the edges and the cuticle area, where the gel layer is thinnest and the natural nail is closest to the surface. Over-filing in these areas is where the natural nail is most likely to be contacted accidentally.
Step Two: Prepare the Soaking Setup
Cut your foil squares and cotton pads before starting the soaking process so everything is ready to go at the same time. Each foil square should be roughly three to four inches square, large enough to wrap around the fingertip securely.
Soak each cotton pad piece in pure acetone until it’s thoroughly saturated but not dripping, and press it flat against the nail surface. The cotton should cover the entire nail from cuticle to tip so that every part of the gel is in contact with acetone throughout the soaking period.
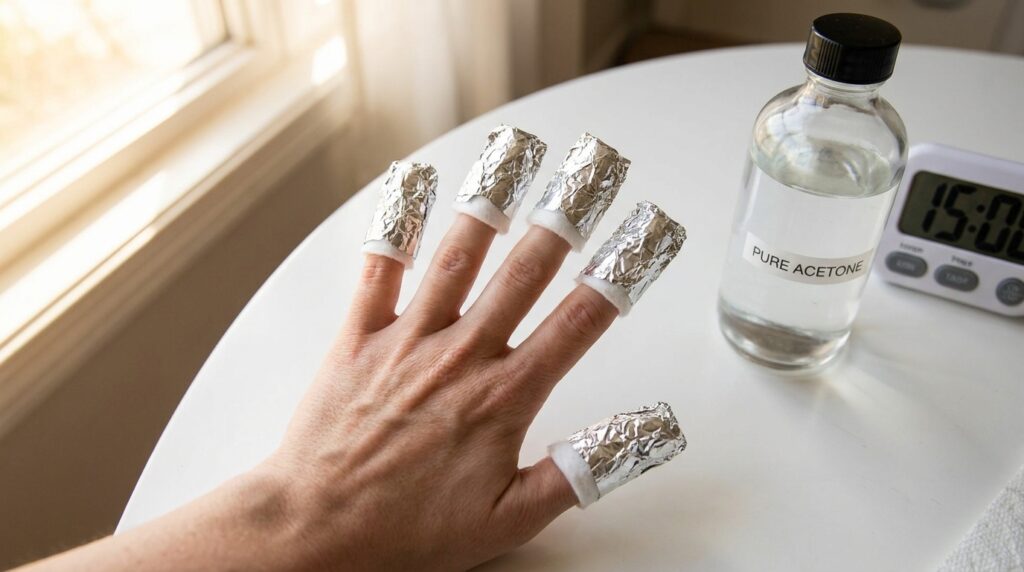
Wrap the foil around the fingertip firmly enough to hold the cotton in place without cutting off circulation. The foil needs to be snug enough that it doesn’t fall off during the soak but not so tight that it’s uncomfortable. Wrapping from underneath the fingertip and folding the foil up over the top of the nail tends to create the most secure hold.
Work on one hand at a time rather than trying to wrap all ten fingers simultaneously. Wrapping the dominant hand first makes the second hand easier to wrap since the dominant hand is free to do the wrapping.
Step Three: Soak for the Right Amount of Time
The soaking time needed depends on the thickness of the gel and how long it has been on the nails, but most gel manicures require between ten and twenty minutes of soaking for the product to soften adequately. Thicker gel or gel that has been on for a long time may need longer. Gel that is relatively fresh or thin may soften faster.
Resist the urge to check too early. The most common mistake in at-home gel removal is unwrapping the foil after seven or eight minutes, finding the gel still attached, and then either trying to force it off or giving up and just peeling. Set a timer for at least fifteen minutes before checking, and if the gel isn’t coming away easily when you check, rewrap and soak for another five to ten minutes.
Keeping the hands warm during the soaking period helps the acetone work faster. Sitting in a warm room, wrapping a warm towel around the foil-wrapped hands, or simply keeping the hands still in a comfortable position all help maintain the warmth that makes the acetone more effective.
Step Four: Remove the Softened Gel
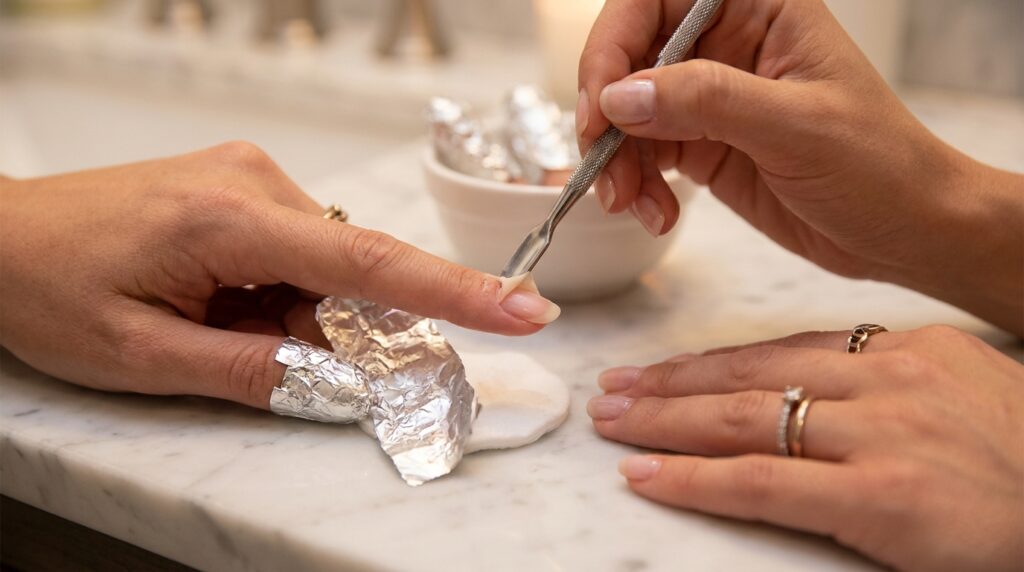
After soaking, unwrap one finger at a time and work quickly since the softened gel starts to harden again as soon as it’s exposed to air and the acetone evaporates. The goal is to remove the softened product while it’s still pliable rather than waiting until it has re-hardened.
Using the cuticle pusher or orange stick, gently push the softened gel from the cuticle toward the tip of the nail using small, gentle strokes. Properly softened gel should slide off with minimal resistance. If you’re having to apply significant pressure or the gel is resisting, it needs more soaking time rather than more force. Re-wrap and soak for another five minutes rather than forcing product that isn’t ready.
Work from the cuticle toward the tip rather than from the tip toward the cuticle, since pushing from the cuticle area follows the natural direction of the nail plate and reduces the risk of catching and lifting the natural nail surface underneath.
If small amounts of gel remain after the first soak, re-wrap just those fingers with fresh acetone-soaked cotton and foil and soak for a further five to ten minutes rather than trying to file or scrape the remaining product off a dry nail.
Step Five: Buff and Clean the Nail Surface
Once all the gel has been removed, lightly buff the nail surface with a fine-grit buffer to smooth any slight roughness or residue left behind. This step should require very little pressure if the gel was properly removed. You’re smoothing rather than filing, and it should take no more than thirty seconds per nail.
Wash the hands thoroughly with soap and water to remove all traces of acetone and dissolved gel residue from the nail surface and surrounding skin. Acetone residue left on the skin can continue to dry it out even after the foil has been removed.
Inspect each nail for any remaining gel by looking at the surface in good light. Any remaining gel will appear as a slightly shiny or differently textured area against the matte natural nail surface and can be gently buffed away with the fine-grit buffer.
Step Six: Restore Moisture and Protect the Nails
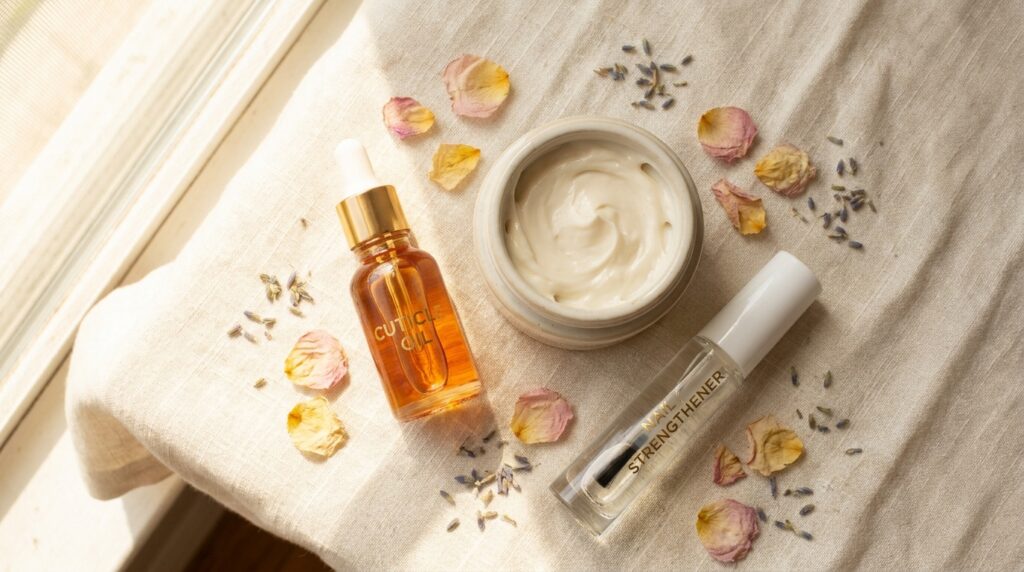
Acetone is extremely drying and the nails and surrounding skin need moisture replenishment immediately after removal. This step is not optional. Skipping it leaves the nails brittle and the skin around them dry and prone to peeling and cracking in the days after removal.
Apply cuticle oil generously to each nail and the surrounding skin and massage it in thoroughly. Cuticle oil penetrates the nail plate and helps restore some of the moisture and flexibility that acetone strips out. Applying it immediately while the nails are still slightly warm from the acetone helps it absorb more readily.
Follow with a rich hand cream applied generously over the entire hand, paying particular attention to the fingertips and the skin around the nails. Repeat the cuticle oil and hand cream application several times on the day of removal and for several days afterward to help the nails and skin recover fully.
Apply a nail strengthening treatment or a nourishing base coat once the nails are completely dry and the cuticle oil has been absorbed. This provides a protective layer over the natural nail while it recovers and helps reinforce the nail plate that may have been slightly thinned by the removal process.
Common Mistakes to Avoid
Rushing the soak is the single most common mistake and the one most directly responsible for nail damage during at-home removal. When the gel hasn’t softened sufficiently, the temptation to push harder or scrape more aggressively means the natural nail is taking the force rather than the product sliding off cleanly. If it’s not coming off easily, it needs more time in the acetone.
Using regular nail polish remover instead of pure acetone significantly extends the soaking time needed and often produces incomplete results that lead to the scraping and forcing that causes damage. The small additional cost of pure acetone is worth it for the much better result it produces.
Filing too aggressively before soaking in an attempt to speed up the process can take the file through the gel and into the natural nail before the acetone has had a chance to work. Light, gentle filing to break the top coat seal is all that’s needed at the first step.
Skipping the moisture replenishment step at the end leaves the nails in a depleted, brittle state that makes them vulnerable to breakage in the days following removal. Even if the actual removal went perfectly, skipping this step undermines the result.
Frequently Asked Questions
How long does at-home gel removal take?
Allow at least 45 minutes to an hour for the full process, including preparation, soaking time, removal, and the finishing steps. Rushing any part of the process increases the risk of damage, so building in enough time is part of doing it correctly.
Can I reapply gel immediately after removing it at home?
It’s better to give the nails at least a day or two to recover before reapplying gel, particularly if the nails look or feel thinner than usual after removal. Applying moisture treatments and strengthening products in the gap between removal and reapplication helps the nail recover before the next service.
Why is my nail still shiny after soaking?
A shiny appearance after soaking usually means the top coat wasn’t adequately broken during the filing step and is preventing the acetone from penetrating effectively. Remove the foil, lightly file the surface again to break through the remaining shine, re-soak the cotton in fresh acetone, and rewrap for another ten minutes.
Is it safe to remove gel nails at home regularly?
Yes, as long as the correct technique is used and the nails are properly moisturized and recovered between removals. The damage associated with gel removal comes almost entirely from incorrect technique, particularly peeling or forcing, rather than from the removal process itself when done properly.
How do I know if I’ve damaged my nails during removal?
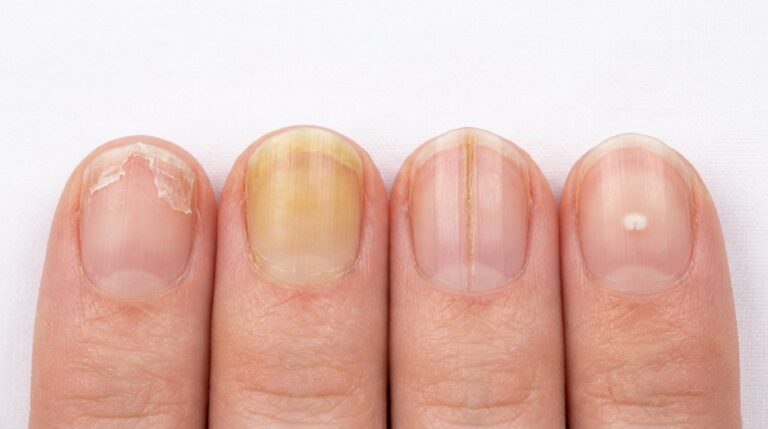
Signs of damage include nails that look white or chalky, feel unusually thin or flexible, are sensitive to pressure, or have a peeling or layered surface texture. If any of these appear, giving the nails a break from gel and focusing on moisture and strengthening treatments for several weeks allows them to recover before the next application.
What should I do if some gel won’t come off even after extended soaking?
Stubborn areas that don’t respond to extended soaking are usually either very thick gel or sections where the acetone hasn’t been making good contact. Try re-filing those specific areas more thoroughly to break the surface, apply fresh acetone-soaked cotton directly to those spots, and rewrap tightly to ensure good contact before soaking for another ten to fifteen minutes.